A visual record of the spaces I study and the playable layouts I build, from early reference gathering through intentional player flow.
CURRENT LEVELIN PROGRESSBLOCKOUT · v10
Site Zero
An SCP-inspired facility level built in Unreal Engine 5 across two maps: a surface entrance dug into a hillside, and the Proving Grounds, an underground facility the player fights through zone by zone. It is in blockout: the layout, sightlines and pacing are being locked down in greybox before any art pass.
Site Zero is the level for my third-person shooter SCP_TPS →
Forecourt→
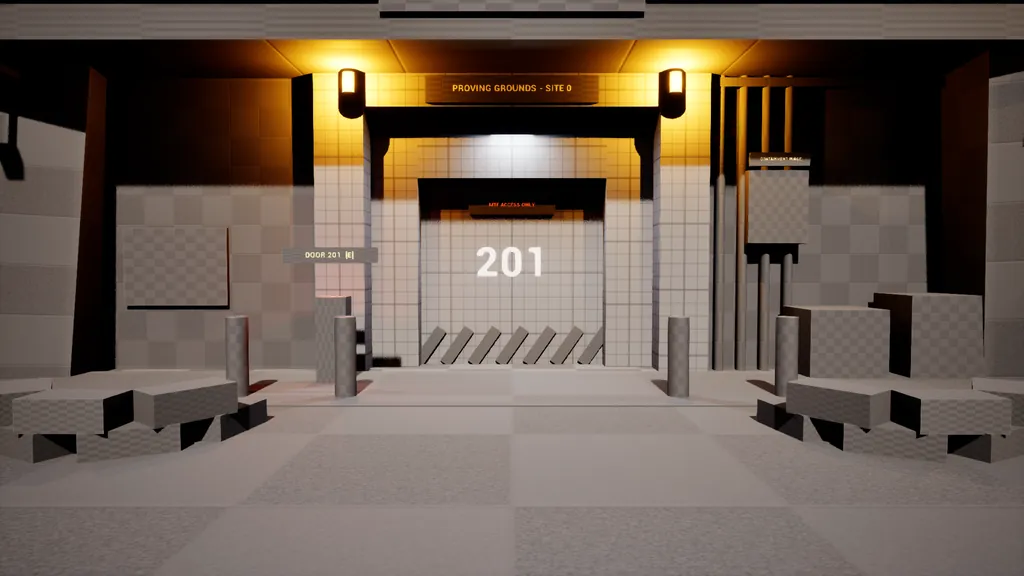
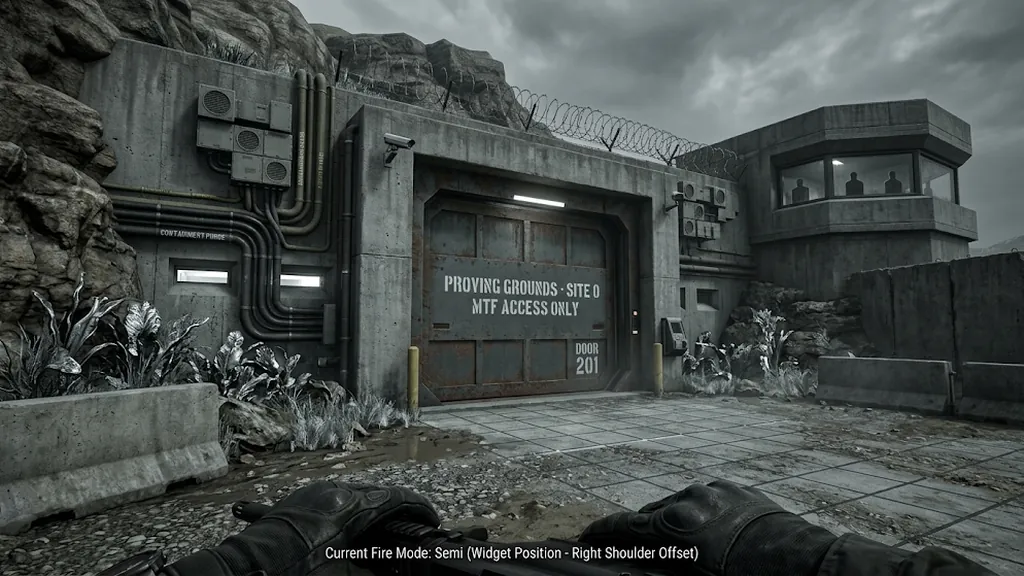
Door 201→
Security checkpoint→
Descent lift→
Zone A→
Armory→
Zone B→
Zone C→
Zone D arena→
Return lift
ROUTE WALKTHROUGH
The route, start to finish
A walkthrough of the critical path built from the v10 blockout captures, in the order the player reaches them: surface, Zones A to D with the F2 flank and Sector L detours, then out through the main corridor to the service yard.
CAPTURED-SHOT WALKTHROUGH · NOT GAMEPLAY0:39 · MUTED · PLAYS WHEN IN VIEW
Forecourt›
Vestibule›
Checkpoint›
Zone A lobby›
Archive›
Zone B hall›
F2 flank›
Zone C atrium›
Medical bay›
Sector L›
Zone D arena›
Main corridor›
Exit checkpoint›
Service yard
REFERENCE LIBRARY
Reference Images
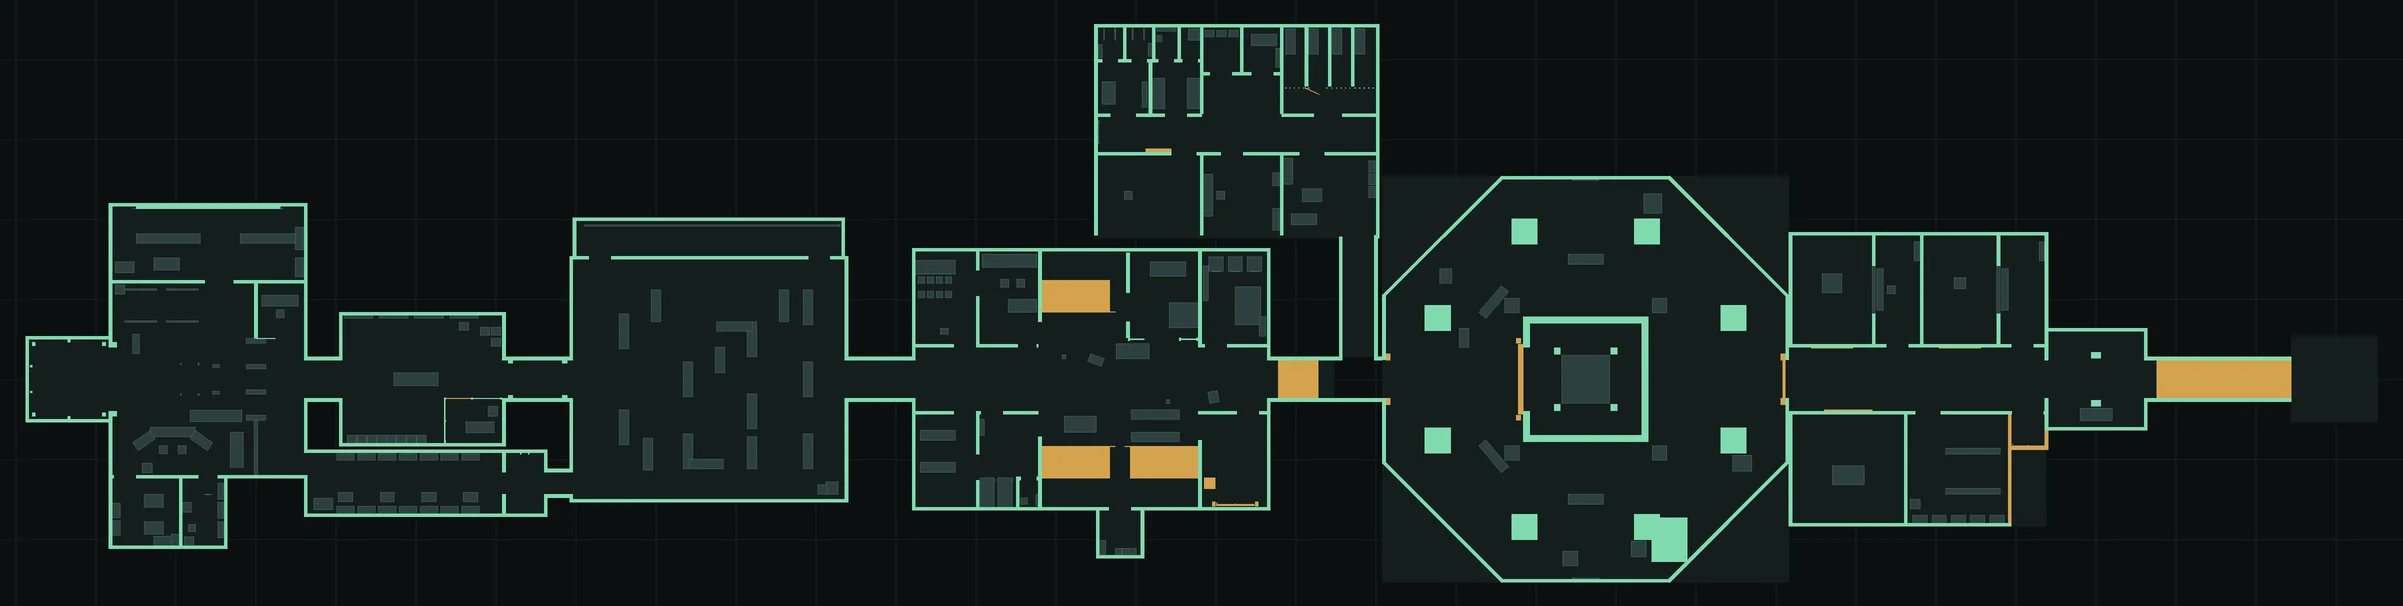
The references Site Zero is built from: the surface entrance, the Door 201 target look and the facility floor blueprints, gathered before the first greybox and used to plan composition, scale and room types.
01 / 06
REFERENCE · 1 OF 6
Surface entrance
Concept for the surface level: a secure blast door cut into the hillside, guardhouse, vehicle checkpoint, freight elevator, vent shaft and surveillance tower. The key reference for the exterior map.
AI-generated concept reference
REFERENCE → BLOCKOUT
From reference to greybox
How the references turned into geometry. The Door 201 capture was framed to match the target render, so the two line up for a direct comparison; the Zone A plan is shown next to the blueprint it was laid out from.
DOOR 201 · REFERENCE VS BLOCKOUT
REFERENCEBLOCKOUT · v8
ZONE A · BLUEPRINT VS PLAN
DEVELOPED DESIGN · WORK IN PROGRESS
Blockout
Site Zero is currently in blockout. Everything below is greybox: engine grid materials, simple meshes and placeholder lighting, built to test the route, cover and readability before art.
STATUS: BLOCKOUT IN PROGRESS · LAYOUT AND LIGHTING SUBJECT TO CHANGE
PROVING GROUNDS · ANNOTATED PLAN
SWIPE SIDEWAYS TO PAN THE PLAN →
ZONE AARMORYZONE BZONE CSECTOR LZONE D · ARENAMAIN CORRIDOREXIT LIFTF1F2F3Sector LSTART · LIFTEXIT → SURFACE
CRITICAL PATH (DASHED = FREE MOVEMENT IN ARENA)OPTIONAL ROUTES F1 · F2 · F3 · SECTOR LSIGHTLINE, RAYCAST CLEAR (✕ = BLOCKED)PLACEHOLDER ENEMY POSITION (HOLLOW = MEZZANINE)BOSS SEAL TRIGGER · SPAWN POINTSCRIPTED ANOMALY EVENTPICKUPSEALED EXITWALLS · COVER · DOORSPLAN NOTES · ROUTES, SIGHTLINE CHECKS, SEALED EXITS
OPTIONAL ROUTES
F1 · Zone B west egress → emergency shaft → one-way door into the Records Archive
F2 · Maintenance corridor behind the Zone B north wall, with an ammo cache
F3 · Emergency shelter C-1 off the atrium: med-kit and staff roster
Sector L · Optional Light Containment wing north of the Zone C→D stairs; its west exit is sealed
SIGHTLINES (EYE HEIGHT)
CLEAR · Lift doors → lobby and Armory door
CLEAR · Zone B entry → centre enemy position
CLEAR · Zone B entry → south enemy position
BLOCKED · Zone B entry → north enemy position, broken by high cover
CLEAR · Zone C centre line across the atrium
CLEAR · Arena door → containment cell door
CLEAR · Arena exit shutter → exit checkpoint
SEALED EXITS
S1 Zone C east lift
S2 main-corridor lift
S3 Sector L west exit
S4 Zone D north exit
S5 Zone D south exit
F1 shaft surface hatch
BLOCKOUT CAPTURES · v10
19 SHOTS
The player starts on the forecourt facing Door 201, then passes through a security checkpoint to the descent lift.
01 / 06
SURFACE · 1 OF 6
Terrain pass
Heightmap landscape blocking in the hill the facility is built into.
ITERATION LOG · v4 → v10
Each pass is scripted, rebuilt and re-captured, so the level moves forward in clear steps.
ITERATION · 6 OF 6
v10 · Nov 3 · Routes, exits and detail
Flank routes F1–F3, six clearly sealed exits and a detail pass across both maps.
The captures on this page are from this pass.
06 / 06
NEXT · v11–v13 IN PROGRESS · Later passes already exist in the editor, including weapon pickup and arena combat work. Captures will be added once they are reviewed.
19 BLOCKOUT CAPTURES · v10 PASS · CLICK ANY IMAGE TO ENLARGE